Liquid variables in flow actions
When you're building flows in Mantle, you can use Liquid variables to make your actions dynamic and personalized. Instead of sending the same message to everyone, you can pull in customer names, subscription details, action results, and more - all automatically.
Think of Liquid variables as placeholders that get filled in with real data when your flow runs. Write {{ customer.name }} and it becomes "Acme Corp" when that customer's flow triggers. It's like mail merge, but for your entire automation system.
How Liquid variables work
Liquid variables use double curly braces to mark dynamic content. When your flow runs, Mantle replaces these variables with actual values from your customer data, previous actions, or trigger events.
Basic syntax:
{{ variable.property }}
For nested properties, use dots to navigate:
{{ customer.subscription.plan.name }}
You can also use Liquid filters and conditionals for more advanced logic:
{% if customer.hasReviewed %}Thank you for your review!{% endif %}
Customer variables
These variables give you access to information about the customer the flow is running for. Available in all flow actions.
Basic customer info
{{ customer.name }}- The customer's name{{ customer.email }}- The customer's email address{{ customer.id }}- The customer's Mantle ID{{ customer.shopifyDomain }}- The customer's Shopify domain{{ customer.shopifyPlanName }}- The customer's Shopify plan name{{ customer.mantleUrl }}- Direct link to the customer's profile in Mantle
Financial metrics
{{ customer.averageMonthlyRevenue }}- Average monthly revenue{{ customer.lifetimeValue }}- Lifetime value{{ customer.last30Revenue }}- Revenue from the last 30 days
Subscription details
{{ customer.subscription.plan.name }}- Current subscription plan name{{ customer.subscription.plan.amount }}- Plan amount{{ customer.subscription.plan.currencyCode }}- Currency code (e.g., "USD"){{ customer.subscription.plan.interval }}- Billing interval (e.g., "monthly", "yearly")
Tags and custom fields
{{ customer.tags }}- Array of customer tags{{ customer.customFields }}- Object containing all custom fields
Example:
Welcome {{ customer.name }}! Your current plan is {{ customer.subscription.plan.name }}.
Usage event variables
When your flow is triggered by a usage event, you can access details about that event:
{{ usageEvent.name }}- The name of the usage event{{ usageEvent.timestamp }}- When the event occurred{{ usageEvent.properties }}- Any properties attached to the event
Example:
Customer {{ customer.name }} just triggered {{ usageEvent.name }} at {{ usageEvent.timestamp }}
Uninstall event variables
When a customer uninstalls your app, you can access details about the uninstall:
{{ uninstall.reason }}- The reason they provided{{ uninstall.reasonCode }}- The reason code{{ uninstall.description }}- Additional description
Example:
{{ customer.name }} uninstalled. Reason: {{ uninstall.reason }}
Previous action outputs
When a flow step is triggered by a previous action completing (using the "flow action completed" trigger), you can access the results of those previous actions. This is incredibly powerful - you can use data from one action to inform the next.
Why this matters: Let's say you send an HTTP request to an API and get back a user ID. With previous action outputs, you can use that user ID in your next step - maybe to send a Slack notification or update a custom field. No manual copying, no hardcoding - just seamless automation.
Accessing previous actions
You can reference previous actions by index. Actions are ordered by when they were created (matching the order you see in the UI):
{{ previousActions[0].outputs.success }}
{{ previousActions[1].outputs.response }}
Standard output structure
All action outputs follow a consistent structure:
{{ previousActions[0].outputs.success }}- Whether the action succeeded (true/false){{ previousActions[0].outputs.response }}- The response data (varies by action type){{ previousActions[0].outputs.statusCode }}- HTTP status code (for HTTP requests){{ previousActions[0].outputs.error }}- Error details (null if successful)
Action-specific outputs
Different action types return different data. Here's what you can access for each:
Tag Customer / Untag Customer
{{ previousActions[0].outputs.success }}- Whether tags were added/removed{{ previousActions[0].outputs.tags }}- Array of tags that were added/removed
Example:
Tags added: {{ previousActions[0].outputs.tags | join: ", " }}
Send HTTP Request
HTTP request actions are where things get really interesting. When you send a request to an API, you get back a response - and you can use that response data in your next steps.
Standard HTTP request outputs
{{ previousActions[0].outputs.success }}- Whether the request succeeded{{ previousActions[0].outputs.statusCode }}- HTTP status code (200, 404, 500, etc.){{ previousActions[0].outputs.response }}- The response body (automatically parsed as JSON if the API returns JSON, otherwise kept as text){{ previousActions[0].outputs.error }}- Error details if the request failed
Example with JSON response:
API returned: {{ previousActions[0].outputs.response | json }}
User ID: {{ previousActions[0].outputs.response.userId }}
Example with error handling:
{% if previousActions[0].outputs.success %}Success! Status: {{ previousActions[0].outputs.statusCode }}{% else %}Error: {{ previousActions[0].outputs.error.message }}{% endif %}
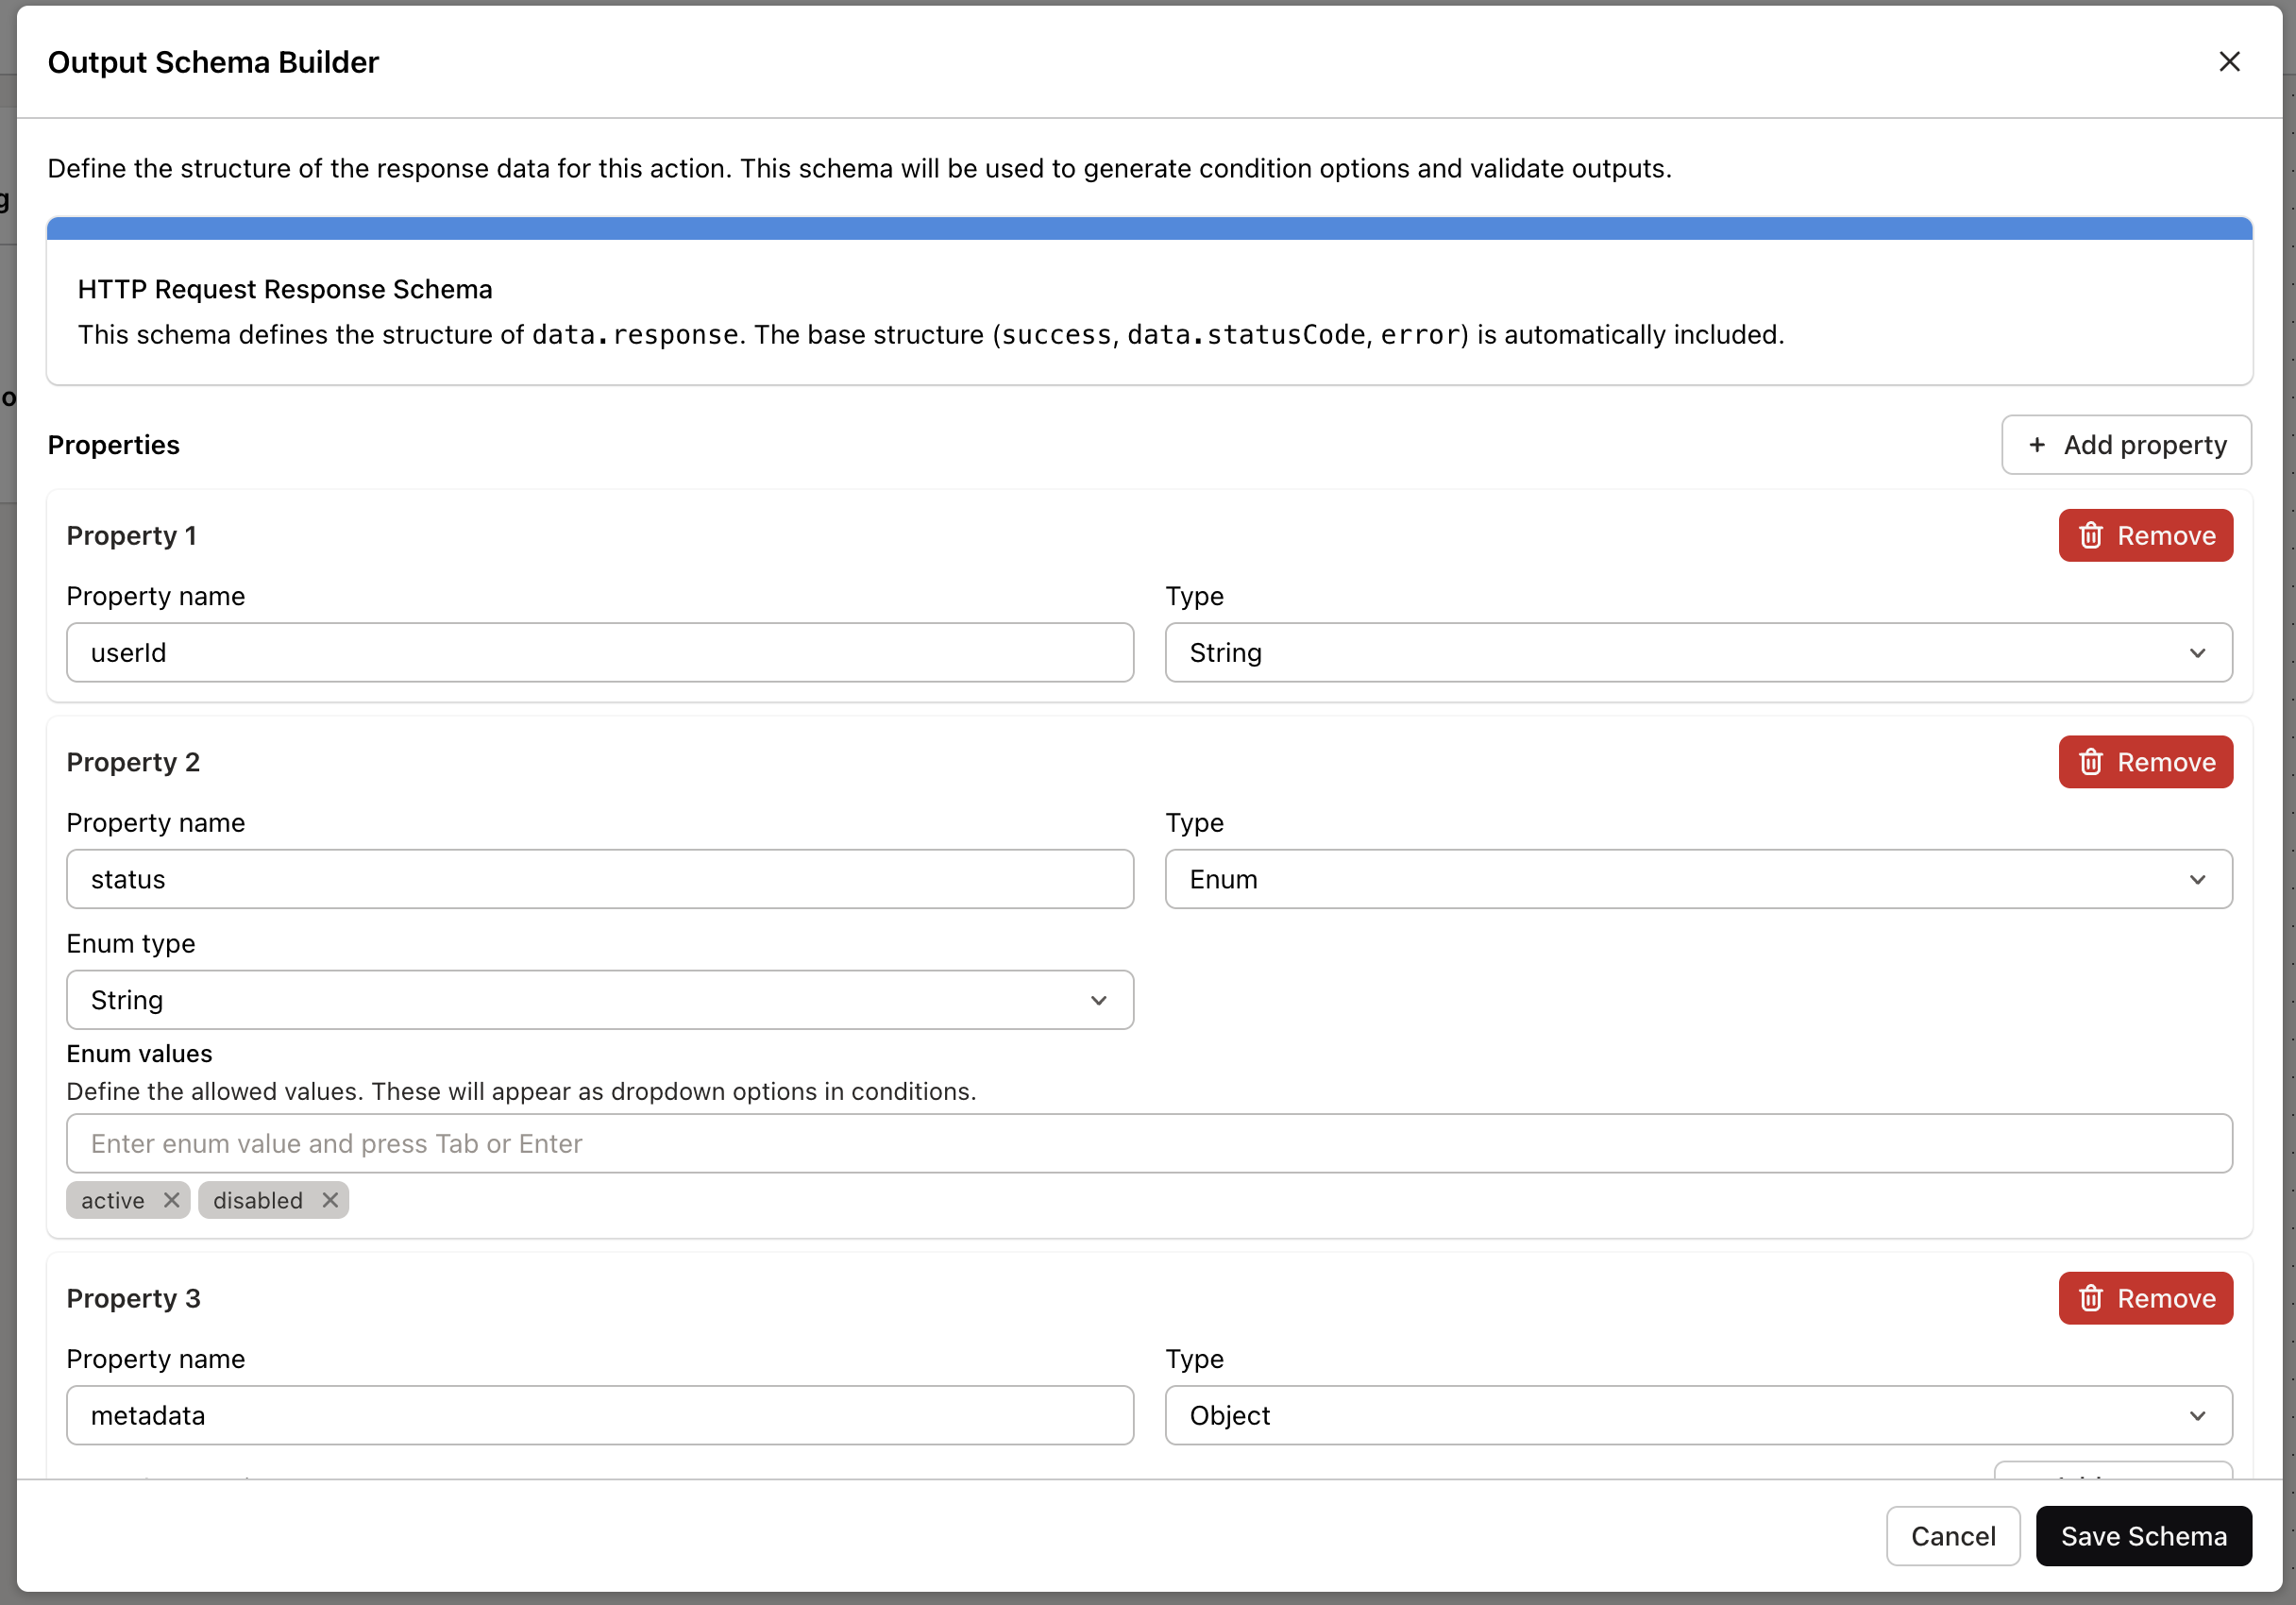
Dynamic schemas for HTTP requests
Here's where HTTP requests get really powerful. You can define a response schema that describes what your API returns. This does two things:
Makes it easier to access nested data in your liquid templates
Generates condition options automatically in the flow builder
How to set it up:
In your flow, select an HTTP request action
Click "Configure Response Schema"
Define a JSON Schema that matches your API's response structure
Example schema:
Let's say your API returns something like this:
{ "userId": "123", "status": "active", "metadata": { "createdAt": "2024-01-01" } }
You'd define a schema like this:
Then in your liquid templates, you can access nested properties easily:
User ID: {{ previousActions[0].outputs.response.userId }}
Status: {{ previousActions[0].outputs.response.status }}
Created: {{ previousActions[0].outputs.response.metadata.createdAt }}
Using enums: If your schema includes enum values (like the status field above), those will show up as dropdown options in the condition builder. So instead of typing "active", you can just select it from a list.
Nested objects: Your schema can be as deep as you need. If your API returns nested objects or arrays, define them in your schema and access them with dot notation:
{{ previousActions[0].outputs.response.user.profile.name }}
Tips and best practices
Always check for success - Use
{% if previousActions[0].outputs.success %}before accessing response dataUse filters for arrays - Join arrays with
{{ tags | join: ", " }}to make them readableDefine schemas for APIs - If you're calling an API repeatedly, define a response schema to make your templates cleaner
Test your variables - Use the flow preview to see what values your variables will have before publishing
Handle errors gracefully - Always include error handling in your templates
Liquid variables turn your flows from static automations into dynamic, personalized experiences. Start simple with customer names and emails, then layer in previous action outputs as your flows get more complex. The more you use them, the more powerful your automations become.