

What's in a flow
Every flow has three main parts that work together to automate your business. Think of it like this: “When this happens, if these conditions are met, then do these actions.”
Let’s break down each piece so you can start building flows that actually work for your business.
Triggers - the “when”
Triggers are what kick off your flow - they’re the events that say “hey, something just happened, time to get to work!” You’ve got tons of options here, from basic app events to custom stuff you track in your app.
Example: “When a customer installs my app…”
Some examples of available triggers are:
Event Type | Triggers | Availability |
|---|---|---|
App events | • Customer installs, uninstalls, or reinstalls app | Ready to use |
Subscription events | • Subscription is activated | Ready to use |
Stripe events | • Invoice is finalized | Ready to use |
Usage events | You can also trigger flows based on any custom event you track in your app. This allows for unlimited flexibility in responding to user actions specific to your business. |
Conditions - the “if”
Conditions are optional, but they’re super handy when you want to get specific about when your flow runs. Think of them as filters - they let you say “only run this flow if the customer also meets these criteria.”
Example: “…and they have a tag of ‘New customer’…”
Some examples of available conditions are:
Condition Type | Examples | Availability |
|---|---|---|
App attributes | • App install date | Ready to use |
Customer attributes | • Customer name | Ready to use |
Customer custom fields | • Custom field values | |
Subscription conditions | • Subscription active | Ready to use |
Usage & engagement | • Usage metrics (page view, SKUs, orders, video views, etc.) | |
Email engagement | • Email has had any click | |
Affiliate conditions | • Referred by | Ready to use |
Actions - the “then”
Actions are where the magic happens - they’re the actual tasks your flow performs when everything lines up. This is the “doing” part of your automation.
Example: “…then send a welcome email and tag them as ‘new customer’.”
Here’s what your flows can do for you:
Action Type | Description | Requirements |
|---|---|---|
Send email | Send an email to the customer | |
Add customer tag(s) | Enter tag(s) to add to the customer. Can also be used to apply specific discounts | Ready to use. For discount application, see Discounts documentation |
Remove customer tag(s) | Enter tag(s) to remove from the customer | Ready to use |
Extend trial | Add additional trial days to a customer’s subscription | Ready to use |
Add timeline comment | Automatically add a comment to the customer’s app timeline | Ready to use |
Populate custom field | Populate a customer’s custom field with a value | |
Assign account owner | Assign an account owner to the customer | Ready to use |
Post Slack message | Post a message to a Slack channel | |
Send HTTP request | Send a request to an external URL | Ready to use |
Send notification email | Send a notification email to your team | Ready to use |
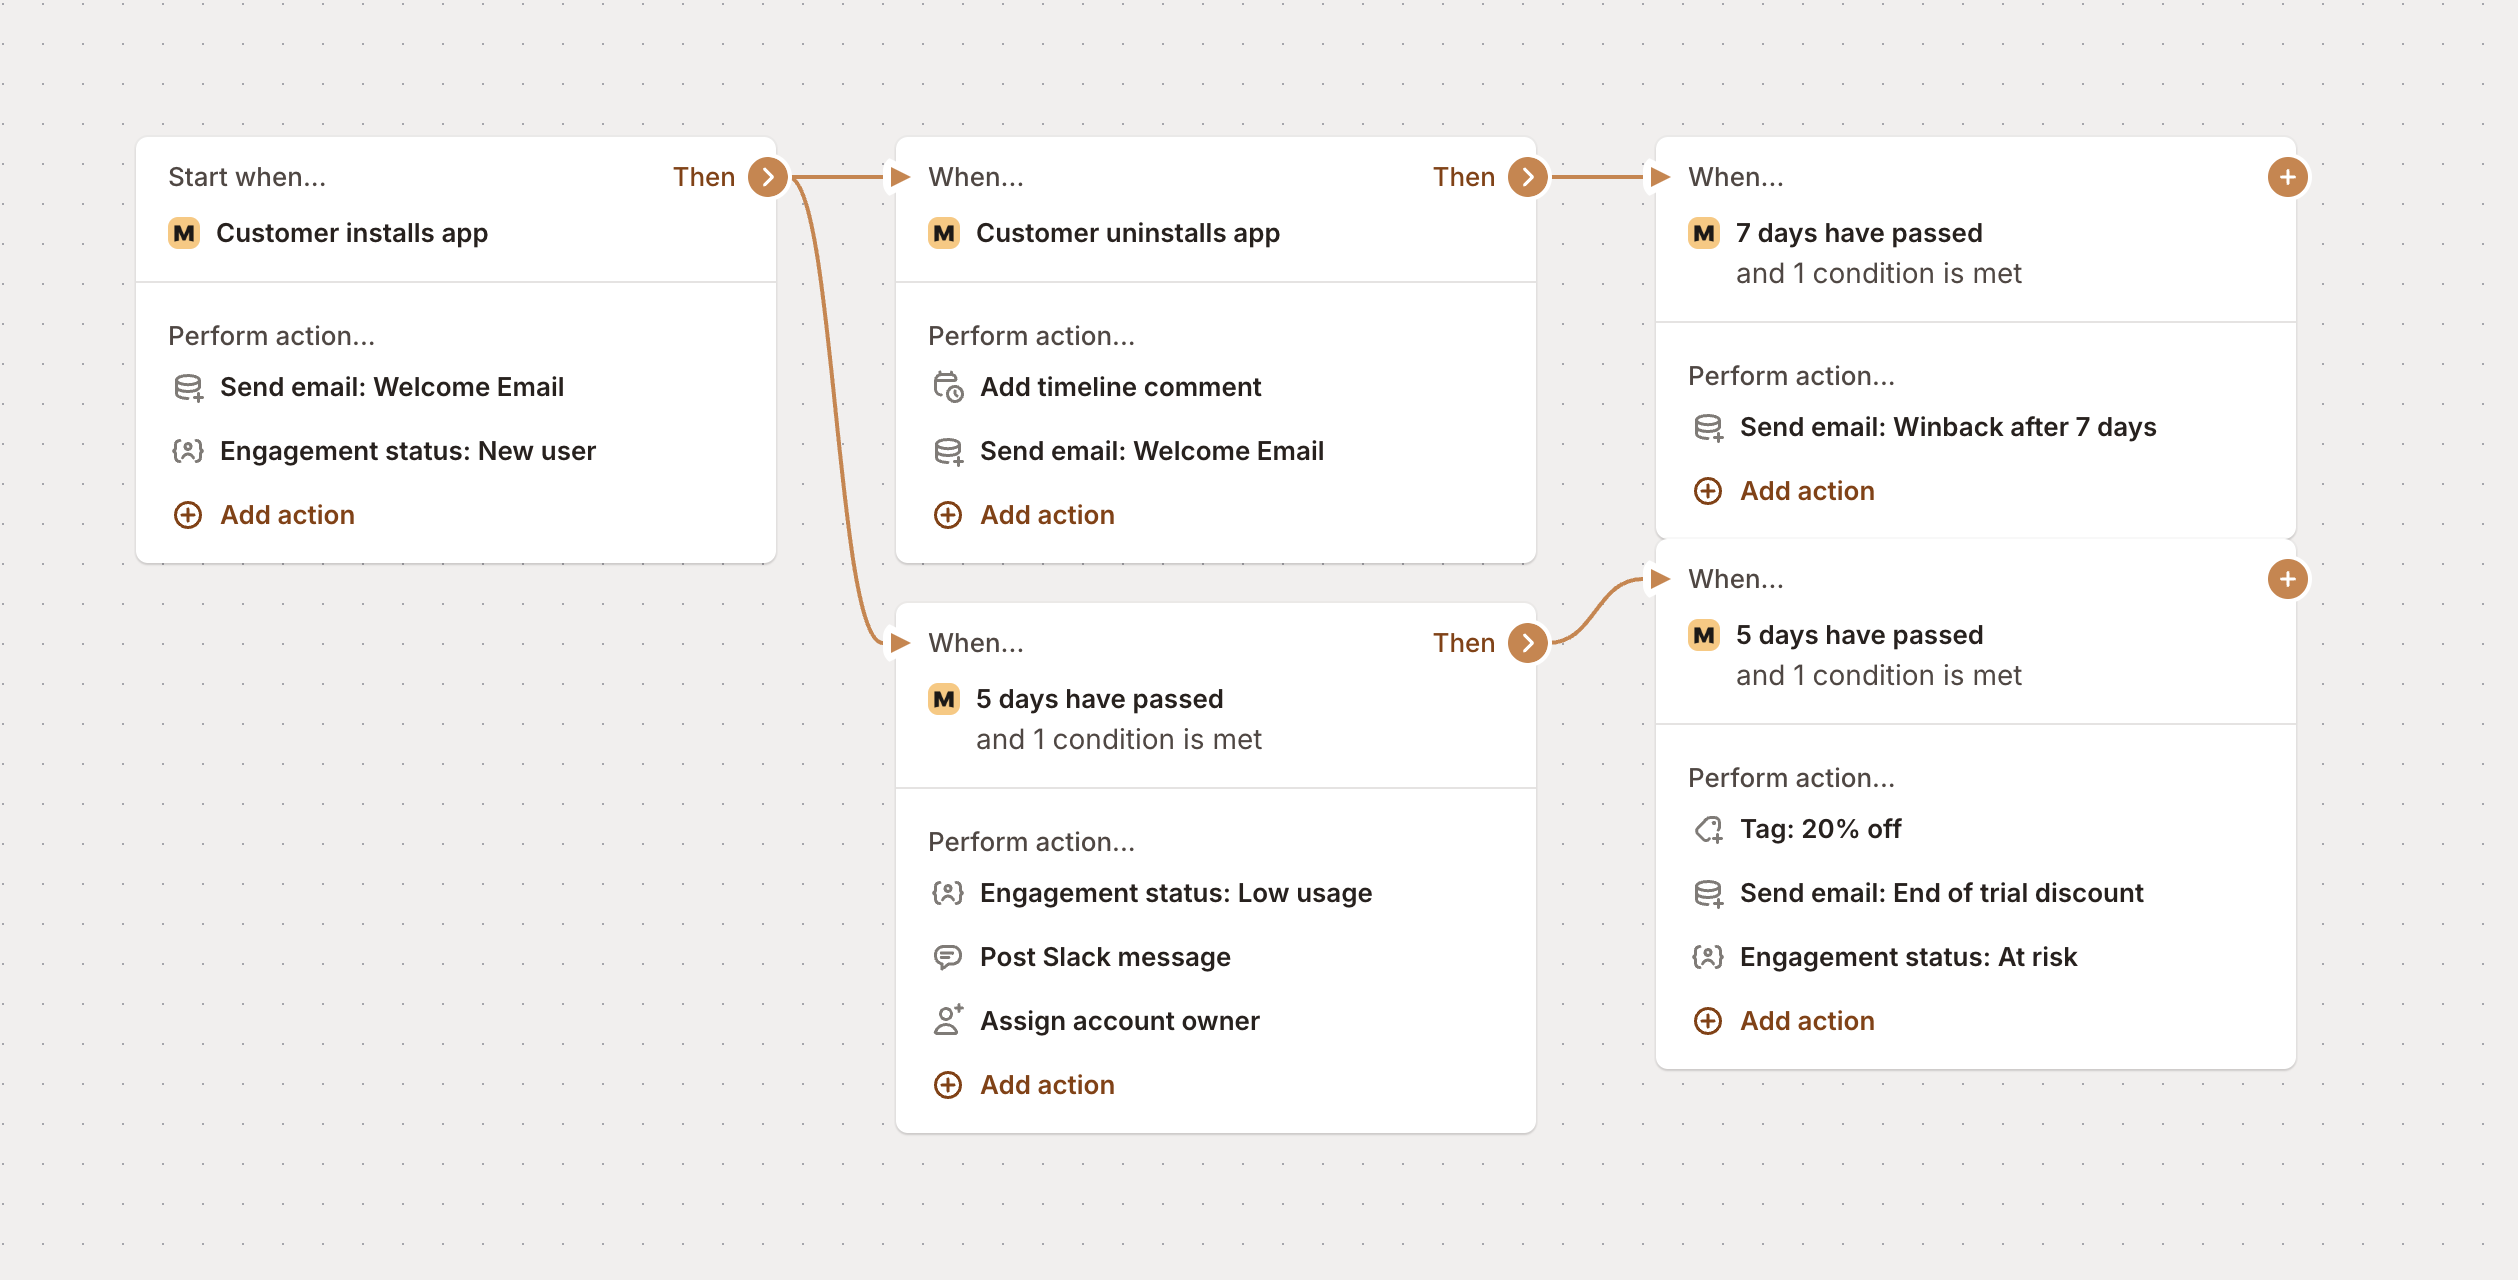
Putting it all together
When you combine these three pieces, you get a complete automation that runs itself:
“When [Trigger] happens, if [Condition] is met, then do [Action].”
For example:
When a customer installs my app
If they’re on a trial plan
Then send a welcome email and tag them as “trial user”
Or get more complex:
When a customer’s trial expires in 3 days
If their usage is below 10 page views
Then send a re-engagement email, assign them to the support team, and post a Slack notification
The beauty of flows is they work 24/7 in the background. Set them up once, and they handle all the repetitive stuff while you focus on growing your business.
Ready to build your first flow? Check out our step-by-step creation guide, or browse our FAQ for answers to common questions.